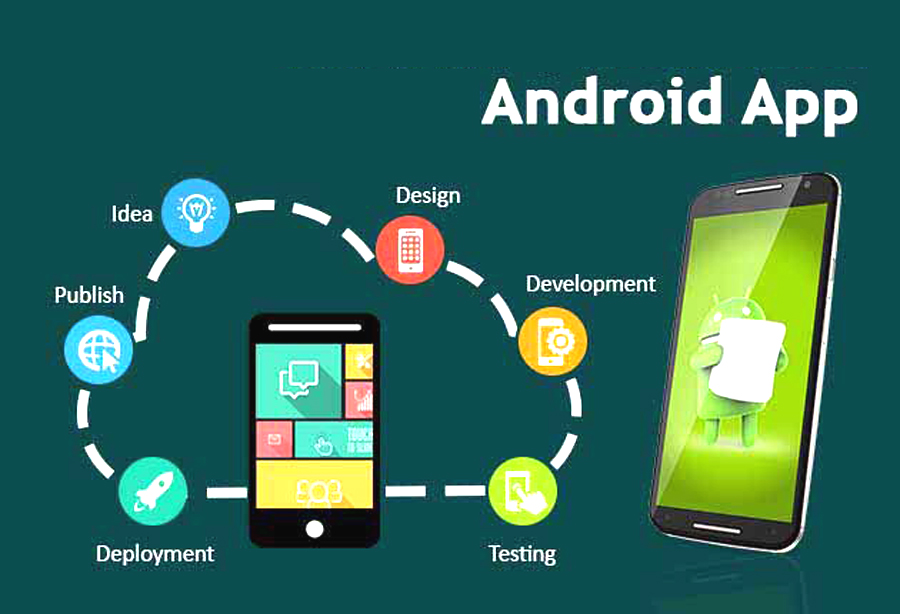
Best Way to Create an Android App: A Comprehensive Guide
Are you looking to develop your own Android app but unsure of where to begin? Look no further! In this article, we will provide you with a comprehensive guide on the best way to create an Android app, covering everything from ideation to deployment. Whether you are a beginner or an experienced developer, this guide will equip you with the knowledge and tools needed to bring your app idea to life.
Creating an Android app can be an exciting and rewarding journey, but it can also be daunting without the right guidance. With millions of apps available on the Google Play Store, standing out from the crowd requires careful planning and execution. By following the steps outlined in this guide, you will gain insights into the crucial aspects of app development, ensuring that your app not only meets the desired functionality but also delivers a seamless user experience.
Defining Your App Idea
In this section, we will explore the importance of defining your app idea and conducting thorough market research. By identifying your target audience and analyzing the competition, you will be able to refine your concept and differentiate your app from others in the market.
Before diving into the development process, it is crucial to have a clear understanding of your app idea. Start by brainstorming and refining your concept to ensure that it aligns with your goals and target audience. Consider the problem your app aims to solve or the value it provides to users. By defining a unique selling proposition (USP) for your app, you can differentiate it from existing solutions.
Conduct Market Research
Market research is essential for understanding the competitive landscape and identifying opportunities for your app. Analyze similar apps in the market to determine their strengths and weaknesses. This will help you identify areas where you can improve or offer a unique feature. Additionally, studying user reviews and feedback for existing apps can provide valuable insights into user expectations and pain points.
Identify your target audience and create user personas to understand their needs, preferences, and behavior. This will help you tailor your app's features, design, and marketing strategy to cater to your specific user base. Conduct surveys or interviews to gather direct feedback from potential users and validate your assumptions.
Refine Your App Concept
Based on your market research and user feedback, refine your app concept to ensure that it addresses the identified needs and stands out from the competition. Consider the core features and functionalities that will make your app valuable and unique. Create a minimum viable product (MVP) scope to focus on the essential aspects of your app and prioritize development efforts.
By defining your app idea and conducting market research, you lay a solid foundation for successful app development. Understanding your target audience and differentiating your app from the competition will increase its chances of success in the competitive app market.
Wireframing and Design
Wireframing and designing your app's user interface (UI) and user experience (UX) are vital steps in the app development process. This section will cover the tools and techniques to create visually appealing and user-friendly app designs that align with your app's functionality.
Wireframing serves as a blueprint for your app's layout and navigation. It helps you visualize the app's structure and user flow before diving into the actual design. Start by sketching rough wireframes on paper or using digital tools like Sketch or Adobe XD. Focus on creating a clear and intuitive navigation flow, ensuring that users can easily access the app's features.
Create a Seamless User Experience
When designing the UI and UX, prioritize simplicity and ease of use. Consider the visual hierarchy of your app's elements, ensuring that important information is easily noticeable. Use consistent color schemes, fonts, and icons to create a cohesive and visually appealing interface. Pay attention to spacing and alignment to ensure a clutter-free and intuitive user experience.
Utilize user interface design principles such as affordance, feedback, and consistency. Affordance refers to designing elements in a way that suggests their functionality. For example, using a button-like design for interactive elements. Provide visual feedback to users when they interact with elements, such as changing the color of a button when pressed. Maintain consistency in design across screens to create a seamless and familiar experience for users.
Responsive Design for Multiple Devices
With the diverse range of Android devices available, it is essential to design your app to be responsive and adaptable to different screen sizes and resolutions. Utilize responsive design techniques, such as fluid layouts and scalable assets, to ensure that your app looks and functions well on various devices. Test your app's design on different screen sizes and orientations to ensure a consistent experience.
By wireframing and designing your app with a focus on user experience and visual appeal, you can create an interface that engages users and enhances their overall satisfaction with your app.
Choosing the Right Development Approach
There are various development approaches available for creating Android apps, including native, hybrid, and cross-platform development. We will discuss the pros and cons of each approach and help you decide which one is best suited for your app.
Native app development involves using programming languages specific to the Android platform, such as Java or Kotlin. It allows for maximum performance and access to device-specific features. However, it requires separate development efforts for different platforms and can be time-consuming.
Pros and Cons of Native Development
Native development offers the advantage of utilizing platform-specific features and APIs, resulting in a highly optimized and performant app. It allows for seamless integration with the Android ecosystem, including Google Play Services and device functionalities. Native apps also typically provide a smoother user experience due to their closer integration with the operating system.
However, native development requires expertise in platform-specific languages and frameworks, which may involve a learning curve if you are new to Android development. It also requires separate development efforts for other platforms like iOS, increasing development time and cost. Additionally, maintaining and updating multiple codebases can be complex and time-consuming.
Alternatively, hybrid app development allows you to build apps using web technologies like HTML, CSS, and JavaScript, wrapped in a native WebView component. This approach offers cross-platform compatibility, as the same codebase can be used for multiple platforms.
Pros and Cons of Hybrid Development
Hybrid development allows for quicker development and easier maintenance since a single codebase can be used across platforms. It leverages web technologies that are widely known and accessible to developers. Hybrid frameworks like React Native and Flutter provide native-like performance and access to device features.
However, hybrid apps may not offer the same level of performance as native apps, especially for complex and resource-intensive applications. They may also have limited access to certain device features or APIs, requiring additional workarounds. Additionally, debugging and troubleshooting can be more challenging due to the underlying web technologies.
Cross-platform development frameworks, such as Xamarin and Flutter, offer a balance between native and hybrid approaches. They allow for building apps using a single codebase while providing near-native performance and access to device features.
Pros and Cons of Cross-platform Development
Cross-platform development frameworks enable code sharing across multiple platforms, reducing development time and effort. They provide access to native APIs and offer a native-like user experience. These frameworks often provide robust tools for UI development and simplified deployment processes.
However, cross-platform development may have limitations when it comes to specific platform features or performance optimization. The initial setup and learning curve for these frameworks can be higher compared to other approaches. Additionally, customization options may be limited, depending on the framework.
Choosing the right development approach depends on factors such as the complexity of your app, development resources, time constraints, and target audience. Consider the trade-offs and requirements of each approach to make an informed decision for your app development journey.
Setting Up the Development Environment
Before diving into coding, you need to set up your development environment. This section will guide you through installing the necessary software, configuring the Android SDK, and setting up emulators or physical devices for testing your app.
The first step is to install Java Development Kit (JDK) and Android Studio, which provides a comprehensive environment for Android app development. Android Studio includes the Android SDK, which contains all the necessary tools and libraries for building Android apps.
Install Java Development Kit (JDK)
Begin by downloading and installing the latest version of JDK from the official Oracle website. Follow the installation instructions specific to your operating system. Once installed, set up the JAVA_HOME environment variable to point to the JDK installation directory.
Install Android Studio
Download and install Android Studio from the official Android developer website. Launch the installer and follow the on-screen instructions. Android Studio will automatically install the necessary Android SDK components and tools.
Configure Android SDK
Launch Android Studio and go through the initial setup wizard. During the setup, you can choose to install additional Android SDK components based on your development requirements. It is recommended to install the latest SDK Platform, along with relevant system images for different versions of Android.
Set Up Emulators or Physical Devices
Android Studio provides emulators that simulate Android devices for testing your app. You can create and configure virtual devices with different screen sizes, resolutions, and Android versions. Alternatively, you can connect physical Android devices to your development machine for testing.
Onceyou have set up the necessary software and configured the Android SDK, you are ready to start developing your Android app. However, before you jump into coding, it is important to familiarize yourself with the development environment and its various components.
Understanding Android Studio
Android Studio is the official Integrated Development Environment (IDE) for Android app development. It provides a comprehensive set of tools and features to streamline the development process. Take some time to explore the various panels, windows, and menus in Android Studio to understand their functionality.
The main window of Android Studio consists of the project structure, code editor, and various tool windows. The project structure displays the organization of your app's files and folders. The code editor is where you write your app's code, and it provides features like code completion, debugging tools, and version control integration. The tool windows offer quick access to features like the layout editor, emulator, and device file explorer.
Exploring the Gradle Build System
Android Studio uses the Gradle build system to automate the process of building, testing, and packaging your app. Gradle is a powerful tool that manages dependencies, compiles code, handles resources, and generates the final APK (Android Package) file for distribution.
The build.gradle file in your app module is where you configure various aspects of your app, such as dependencies, build types, and signing configurations. Understanding how to modify this file allows you to customize your app's build process and optimize its performance.
Using the Layout Editor
The layout editor in Android Studio allows you to visually design your app's user interface. It provides a drag-and-drop interface for placing UI elements, and you can customize their properties using the property inspector. The layout editor generates XML code that defines the structure and appearance of your app's UI.
Take some time to experiment with the layout editor and its features. Familiarize yourself with the different layout types, such as LinearLayout and ConstraintLayout, and learn how to use constraints and guidelines to create responsive and flexible layouts.
Using the Android Virtual Device (AVD) Manager
The Android Virtual Device (AVD) Manager allows you to create and manage virtual devices for testing your app. You can choose from various device configurations, such as screen size, resolution, and Android version. The AVD Manager also allows you to simulate different hardware features, such as camera and sensors.
Create a few virtual devices with different configurations to test your app's compatibility across devices. Use the AVD Manager to launch and run your app on these virtual devices, and observe how it behaves on different screen sizes and resolutions.
Setting up your development environment is crucial for efficient coding and testing of your Android app. Familiarize yourself with Android Studio, the Gradle build system, the layout editor, and the AVD Manager to make the most out of your development experience.
Building the App's Architecture
A well-structured app architecture is vital for scalability and maintainability. We will explore different architectural patterns, such as Model-View-Controller (MVC) and Model-View-ViewModel (MVVM), and help you choose the most suitable one for your app.
The architecture of your app determines how its components are organized and interact with each other. A good architecture separates concerns, promotes code reusability, and allows for easier maintenance and testing. Let's explore two popular architectural patterns: Model-View-Controller (MVC) and Model-View-ViewModel (MVVM).
Model-View-Controller (MVC)
MVC is a widely-used architectural pattern that separates an app into three main components: the model, the view, and the controller. The model represents the data and business logic of the app. The view is responsible for displaying the user interface, and the controller handles user input and coordinates the communication between the model and the view.
In the MVC pattern, the model and the view are decoupled, and the controller acts as an intermediary. This separation allows for easier maintenance and testing since changes to one component don't directly affect the others. However, in complex apps, the controller can become bloated and hard to manage.
Model-View-ViewModel (MVVM)
MVVM is an architectural pattern that builds upon MVC and introduces the concept of a view model. The model represents the data and business logic, and the view is responsible for displaying the UI. The view model acts as a bridge between the model and the view, providing data and handling user interactions.
In MVVM, the view model exposes data and commands that the view binds to. This binding mechanism allows for a more declarative and reactive approach to building UIs. The separation of concerns in MVVM leads to better code organization and testability.
Choosing the Right Architecture
Choosing the right architecture for your app depends on various factors, such as the complexity of your app, the size of the development team, and the expected future changes. MVC is a good choice for smaller projects or when you have a clear separation between the model and the view. MVVM is well-suited for larger projects with complex UIs and a focus on testability and maintainability.
Consider the specific requirements and scope of your app when deciding on the architecture. You can also explore other architectures like MVP (Model-View-Presenter) or Clean Architecture, depending on the specific needs of your project. The key is to choose an architecture that promotes code organization, separation of concerns, and scalability.
Building a solid app architecture ensures scalability and maintainability of your Android app. Take the time to understand different architectural patterns and choose the one that best fits your app's requirements and development team.
Coding and Implementing Functionality
In this section, we will delve into coding and implementing the core functionality of your app. From handling user input to integrating APIs and databases, we will provide you with practical tips and code snippets to bring your app to life.
Handling User Input
One of the fundamental aspects of app development is capturing and handling user input. Whether it's tapping a button, entering text in a form, or interacting with various UI elements, it is important to implement the appropriate event listeners and callbacks to capture user actions.
Android provides various UI elements, such as EditText, Button, CheckBox, and more, which can be used to capture user input. Use these elements along with appropriate listeners, such as OnClickListener or OnCheckedChangeListener, to respond to user actions.
Implementing Navigation
Navigation plays a crucial role in providing a seamless user experience. It involves moving between different screens or fragments within your app. Android provides various navigation components, such as NavigationView, BottomNavigationView, and ViewPager, to implement navigation efficiently.
Consider the structure of your app and how users will navigate between different sections or features. Implement navigation using appropriate components and define the navigation flow in your app's architecture. Utilize features like back navigation and deep linking to enhance user convenience.
Integrating APIs
Integrating APIs allows your app to access external services and data. Whether it's retrieving data from a RESTful API, integrating social media login, or using location services, APIs provide essential functionality to enhance your app's capabilities.
Begin by understanding the API documentation and the required authentication methods. Use libraries like Retrofit or Volley to simplify API communication. Implement the necessary API calls, handle responses, and parse the data to populate your app's UI or perform desired actions.
Working with Databases
Persisting data is often a crucial requirement for many apps. Android provides various options for working with databases, including SQLite, Room, or Firebase Realtime Database. Choose the appropriate database solution based on your app's complexity and data storage needs.
Design your database schema and create the necessary tables or collections to store your app's data. Implement database operations like inserting, updating, and querying data using the appropriate APIs or ORM (Object-Relational Mapping) frameworks. Ensure proper error handling and data validation to maintain data integrity.
Implementing App Permissions
App permissions are essential for accessing sensitive user data or device features. Android requires explicit user consent for certain permissions, such as camera access, location, or contacts. Ensure that you request the necessary permissions at runtime and handle the user's response appropriately.
Use the Android Permissions API to check for and request permissions. Handle permission callbacks and gracefully handle scenarios where the user denies permission. Additionally, consider providing explanations to users about why certain permissions are needed to build trust and transparency.
Testing Your App
Thorough testing is crucial to ensure the quality and stability of your app. Android provides various testing frameworks, such as JUnit and Espresso, to help you write unit tests and UI tests for your app.
Write unit tests to verify the functionality of individual components or classes within your app. Use UI tests to simulate user interactions and validate the behavior of your app's UI. Consider edge cases and handle potential exceptions to ensure robustness.
Debugging and Error Handling
Debugging is an essential part of app development. Android Studio provides a range of debugging tools to help you identify and fix issues in your code. Utilize breakpoints, log statements, and the Android Monitor to track the execution flow and investigate potential errors.
Implementproper error handling throughout your app to provide meaningful error messages to users and facilitate bug fixing. Utilize try-catch blocks to catch exceptions and handle them gracefully. Implement logging mechanisms to capture and track errors for easier debugging.
Optimizing App Performance
Optimizing your app's performance is crucial for providing a smooth and responsive user experience. Users expect apps to load quickly, respond promptly to their actions, and consume minimal device resources. Here are some tips to optimize your app's performance:
Efficient Memory Management
Ensure efficient memory management in your app to prevent memory leaks and excessive memory usage. Avoid unnecessarily holding references to objects, release resources when they are no longer needed, and use appropriate data structures to minimize memory consumption.
Asynchronous Operations
Perform time-consuming operations, such as network requests or database queries, asynchronously to avoid blocking the main UI thread. Utilize background threads or asynchronous programming techniques like coroutines to keep the UI responsive and prevent ANR (Application Not Responding) errors.
Image and Resource Optimization
Optimize the size and format of images and other app resources to reduce file size and improve loading times. Compress images without compromising quality, use vector graphics wherever possible, and minimize the use of large asset files or unnecessary resources.
Caching and Data Persistence
Implement caching mechanisms to store frequently accessed data locally and reduce the need for repeated network requests. Use appropriate caching strategies, such as in-memory caching or disk caching, depending on the nature of the data. Implement data persistence techniques, such as database storage, to minimize data retrieval time.
Code Optimization
Review your code for potential performance bottlenecks and optimize critical sections. Identify any unnecessary loops, redundant calculations, or inefficient algorithms and refactor them to improve efficiency. Utilize profiling tools in Android Studio to identify areas of your code that can be optimized.
Testing and Debugging Performance
Thoroughly test and profile your app's performance to identify potential issues and areas for improvement. Use profiling tools in Android Studio, such as the CPU profiler and memory profiler, to measure and analyze your app's performance characteristics.
Utilize tools like Systrace and Android Profiler to monitor CPU usage, memory allocation, and network activity during different app scenarios. Identify any performance bottlenecks, such as excessive CPU usage or memory leaks, and optimize your code accordingly.
Optimizing your app's performance enhances user satisfaction and increases the chances of positive reviews and user retention. Continuously monitor and improve your app's performance to provide a smooth and efficient user experience.
Publishing Your App to the Google Play Store
Once your app is ready, it's time to share it with the world. This section will guide you through the process of publishing your app on the Google Play Store, including preparing the app listing, generating signed APKs, and complying with app store guidelines.
Create a Developer Account
To publish your app on the Google Play Store, you need to create a developer account. Visit the Google Play Developer Console website and sign up for a developer account. Pay the one-time registration fee, provide the necessary account information, and accept the terms and conditions.
Prepare Your App Listing
Before submitting your app, ensure that you have prepared all the necessary information for the app listing. This includes the app's title, description, screenshots, and promotional materials. Write a compelling and informative app description that highlights its key features and benefits.
Create high-quality screenshots and promotional graphics that showcase your app's user interface and functionality. Ensure that the screenshots are clear, visually appealing, and accurately represent the app's content. Consider localizing your app listing to reach a wider audience.
Generate Signed APKs
Prior to submission, you need to generate signed APKs (Android Package files) for your app. This involves signing your app using a private key to ensure its authenticity and integrity. Android Studio provides a straightforward process for generating signed APKs.
Generate a private key or use an existing one, and configure your app's signing settings in Android Studio. Build a release version of your app and sign it using the generated private key. Android Studio will generate the signed APK file, ready for submission to the Google Play Store.
Comply with App Store Guidelines
Before submitting your app, ensure that it adheres to the guidelines and policies set by the Google Play Store. Familiarize yourself with the content and development policies, as well as any specific guidelines related to app categories or functionalities.
Ensure that your app does not violate any copyright or intellectual property rights. Avoid including misleading or deceptive information in your app listing. Comply with any restrictions or guidelines related to monetization, in-app purchases, or advertising.
Submit Your App for Review
Once you have prepared your app listing, generated the signed APKs, and ensured compliance with the guidelines, you are ready to submit your app for review. Log in to the Google Play Developer Console, navigate to the app's listing, and follow the submission process.
Provide all the necessary information, screenshots, and promotional materials as prompted. Review and confirm the submission details before finalizing the submission. Your app will undergo a review process by the Google Play Store team to ensure compliance with policies and guidelines.
After the review process is complete, your app will be published on the Google Play Store and made available to Android users worldwide. Monitor user feedback and reviews, and be responsive to user inquiries or bug reports to maintain a positive presence on the app store.
Maintaining and Updating Your App
After launching your app, it's essential to maintain and update it regularly to address user feedback, fix bugs, and introduce new features. This section will provide insights on how to keep your app relevant and engaging to retain and attract users.
Listen to User Feedback
Pay attention to user feedback and reviews to understand user needs, identify areas for improvement, and address any issues or bugs. Encourage users to provide feedback through in-app prompts or a dedicated feedback mechanism. Regularly review and analyze user feedback to prioritize feature enhancements and bug fixes.
Fix Bugs and Optimize Performance
Continuously monitor your app's performance and stability to identify and address any bugs or performance issues. Regularly release updates that fix reported bugs and optimize your app's performance. Use analytics tools to track crashes, ANRs, and other app metrics to identify areas that require improvement.
Introduce New Features and Enhancements
Maintain user engagement by periodically introducing new features and enhancements to your app. Consider user feedback, market trends, and competitors to identify potential features that add value to your app. Plan and prioritize feature releases based on user needs and development resources.
Ensure Device Compatibility and Security
Stay up-to-date with the latest Android versions and device capabilities to ensure your app remains compatible with new devices and operating system updates. Test your app on different devices and configurations to ensure a consistent user experience. Address any security vulnerabilities promptly and release updates to protect user data.
Promote Your App
Continuously promote your app to attract new users and retain existing ones. Utilize various marketing channels, such as social media, app directories, and targeted advertising, to increase app visibility. Leverage user testimonials and positive reviews to build trust and credibility.
Regular maintenance and updates are crucial for ensuring the longevity, user satisfaction, and continued success of your app. By listening to user feedback, fixing bugs, introducing new features, and promoting your app, you can provide an engaging and relevant experience to your users.
In conclusion, creating an Android app involves a systematic approach that encompasses ideation, design, development, testing, optimization, and deployment. By following this comprehensive guide, you are equipped with the knowledge and resources to embark on your app development journey confidently. Remember, the best way to create an Android app is to combine creativity, user-centric design, efficient development practices, and continuous improvement to deliver an app that stands out in the competitive app market.